My adventures on a hardtail started with low quality components typical of a budget mountain bike. Over time I learned a thing or two about upgrading components on my budget bike, and the best upgrades for hardtail MTBs don’t have to cost you an arm and leg.
If you’re coming from a similar budget hardtail mountain bike background like I did, and the components just doesn’t seem to cut it any more, hopefully you can get a good idea or two from this.
Bike bells are absolutely at the top of the list.. kidding! Here’s a list of good simple upgrades you can do that makes an immediate change in how you feel about your bike; and it but won’t break the budget either:
- Pedals are easy and cheap, I have these on my Giant Talon: Imrider Lightweight Polyamide Bike Pedals
- Wheels & Tires conversions like these with Free Continental Race King Tires: Mavic/Shimano 29’er Mountain Bike XM 119.
- Grips simple and comfortable, See Amazon’s full selection of Bike Grips here.
- Saddle .. for your important jewels: See the Best Saddle Choices on Amazon Here
.
- Brakes. Hydraulic brakes aren’t as expensive as you think: See the price of Shimano M315’s Here
.
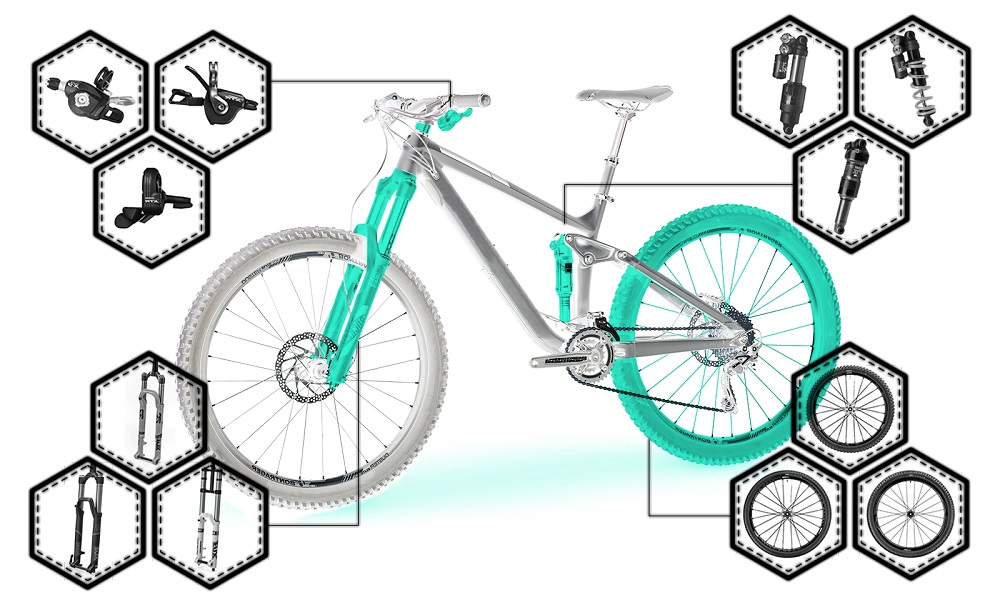
More advanced upgrades include fork upgrades, seatpost droppers, cranks, and drive train components. In my opinion, do these upgrades only when you feel the limitations of your current bike.
Contents
So, Where To Start MTB Upgrades?
So you have a budget hardtail mountain bike similar to one of these we mentioned in this article: Click Here.
There can be a lot of things you might want to change, but that depends mainly on your budget and on what component you feel limits you the most. Determine what’s the best upgrade for what you’re riding often can be a little tricky, but here’s a few questions that helped me decide on which components to upgrade first:
- Safety is always the most important factor, so if there’s anything that I FEEL poses a risk to my safety I immediately upgrade no-questions-asked. Like brakes.
- What part of the bike bothered me most on rides?
- What was the most uncomfortable about my bike?
- Do I REALLY need to upgrade it?
- How much does it cost?
- Can I DIY install the upgrade myself, or do I pay and let a bike shop handle it?
Like I mentioned before, start with the small things first. If you don’t like your saddle, start there!
I, personally, upgraded my pedals before anything. My budget bike came originally equipped with cheap metal cage pedals… and I could not stand them any longer after a few trail rides. Plus, when those hit the shin… they’re the WORST.
3 Simple Bang-For-Your-Buck Hardtail MTB Upgrades
“Bang-for-your-buck” is so relative. We all have a certain level of discretionary income to spend depending on how much money we make. $100 might not seem like a lot to you, but to me it is!
But I think we can all agree on the low-cost of these 3 simple items:
- Pedals
- Grips
- Tires
I like to call these sites on the bike the “point of contact.” These are the contact points for your hands, feet, and the ground. I would’ve included the saddle for your behind but it’s not as important as these 3.
On a hardtail, having a good set of tires is important because of the beating the bike takes on the rear end out on the trails. Tires help with this so get a good pair..
There are too many upgrades that can be done to a bike. As much as I wanted a new front fork (which I’ve now done) and to change out my drivetrain, at the time I didn’t have the budget that goes with doing those upgrades either. A good front fork can cost a few hundred dollars, and it’s the same with drive train components. I’ll talk about those in the next section, but in this section I’ll fill you in on the least expensive components that makes the biggest difference.
My very first upgrade were to the pedals. It’s simple and easy solution to allowing my feet better grip and control of the rear of my bike.
Second, handle-bar grips. EASY.
Trailworthy Upgrades for Your Mountain Bike – Advanced
It took me years before I realized how HORRIBLE the front fork that was originally equipped with my budget bike felt. I’m talking about the Suntour XCT, of course, which also came with a yellow sticker on it that said something along the lines of “not trail worthy, do not use at the risk of your life.”
Anyway, I finally decided it was time to upgrade my front fork after too many close calls with those Suntours on rougher stuff. I am now a proud owner of an air fork: Manitou Marvel. They completely changed the way the bike felt and handled. They were also MUCH lighter and just all around better in every way.
Trailworthy upgrades include:
- Any drive train components: chain ring/derailleur/cassette/chain/
- Suspension
- Cranks/BB
- Hubs
- Handlebars/Stem
I did not go with Rockshox or Fox simply because they didn’t have the bang-for-the-buck as the Manitou did. With Rockshox or Fox, it’s possible that branding adds some cost to the final price. Also, the Manitou Marvel’s had really great user reviews that pushed me to get them.
What Kind of Hand Tools Do You Need?
Simple tools. But, very importantly, not common house hold tools – like wrenches.
Some bike tools are very specialized. For example, if you want to change out your pedals, using a house hold wrench isn’t a good idea so you would need a pedal wrench tool that looks like this: PW-3 Park Tool Pedal Wrench.
What you also need to understand is that to do any of these upgrades yourself, you need a good set of bike tools. Lots of rider like the Park Tool brand like I mentioned above, but if you check out their prices for a tool kit (or any tool actually) you’ll be in for sticker shock. See prices here: Park Advanced Tool Kit (40+ Piece)
I have my own bike tools from a brand called “Bike-Hand.” I’ve had them for over a year and haven’t had any issues. They are quality tools that I have never had a problem with and were great for my budget-conscious self. Read real user reviews and see how much cheaper they are compared to Park Tool Kit on Amazon here: Bike Hand Tool Set.
Maybe you can’t stand the grips, maybe you hate the tires that originally came with the bike, maybe that front fork or saddle isn’t trailworthy for the places you’re going anymore. Whatever the case, this article was put together simply for helping you make the right upgrade.
It simply comes down to the matter of recognizing
Are Accessories Worth It?
If you can do without accessories, it’s usually for the better as that cuts down on the amount of weight your pedaling around.
But going on long rides, having some things in case of emergencies or to sustain yourself during rides are crucial.
So, depending on your type of riding, having things like a GPS, sport watch, hydration packs could be essential. I think they’re all worth it, but is it worth taking with you on shorter or longer trips is the biggest question.
Here’s a few accessories I’m going to name off the top of my head:
- Helmet
- Gloves
- Storage solutions: backpack vs fanny pack vs frame packs
- Hydration bottles/bags
- Safety Glasses
- Shorts
- Shoes
- Knee pads and/or shin pads
- Spare tubes
- Tire pumps / C02
- Shock Pump
- Multi-tool
I’m sure there’s more things that can be added to the list, but as you can see it’s already starting to weigh you down if you’re not careful.
I, personally, ALWAYS carry the following no matter how short my rides:
- Helmet
- Gloves
- Multitool
- Hydration bottle or camelbak
- Shin Pads
That’s the minimum. I USUALLY also have my tire pump, tube patch kit (if no spare tube), car keys, wallet, cell phone, small first-aid kit, small bottles of DEET, sunscreen, $20 cash.
It’s always better safe than sorry so many times I end up carrying a lot of things I didn’t use at all. And that’s ok! Just be smart and plan ahead on trips.
What Kind of MTB Upgrades NOT to Do
For road bikes, take it from the the professionals themselves, watch this video of the top 5 road bike upgrades you don’t need:
Final Thoughts
Don’t upgrade if there’s no reason to! You’ll know when it comes time. You start to feel how much the components hold you back. Especially when you find yourself enjoying the MTB scene.
Some of the basic upgrades and advanced upgrades give you a more “trailworthy” bike. Customizing your bike to your is probably the best part of dialing in your bike.
Another tip I hope that helps is: sometimes you just need to get a tune-up/overhaul instead of replacing or upgrading parts. If you can’t perform tune-ups, take it to your local bike shop so they can have a go at it. It might be worth it over replacements!
The secret to how well you ride is NOT in the bike or the components, it’s the rider. Here’s the famous saying among the community:
It’s the rider – not the bike.
So if you feel like you HAVE to get that expensive fork, or that $600 dollar dropper post, or upgrade to a whole new full suspension carbon boutique bike decked out with the latest and greatest…listen – that stuff might help, but it’s also possible to be the slowest rider with the nicest bike. That’s a little embarrassing, but to each their own!
Whatever the case, just enjoy the ride.
RIDER UP.

