Crazy fact: I gradually worked up to 11 (yes, eleven!) patches on one inner tube once because I was too cheap to go out and buy new tubes every time I had a puncture. Before you go after me with a pitch fork with my Frankenstein tube, here’s another crazy fact: they ALL HELD UP… until my next pinch flat / thorn / sharp rock hit that is. You may stop at 2 or 3 patches, I don’t judge, to each their own!
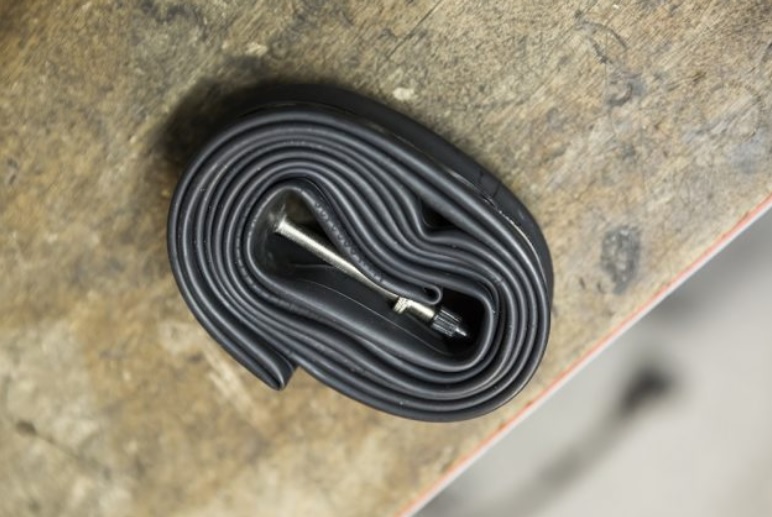
Patching a bike tube is simple, all it takes is: pre-glued patch (such as this: Park Tool GP-2 Super Patch Kit), or a simpler patch kit that includes some sand paper, patches, and rubber cement. The latter is what I use for reasons I’ll explain below, but it’s similar to this one: Park Tool Vulcanizing Patch Kit VP-1.
By using patches, I’ve saved a ton of money – in the case of the 11 patches – that’s about 80 bucks if you figure about 7 bucks a pop – plus tax from a bike shop. With that much money saved, I could’ve bought some awesome fast rolling tires instead like these.
Contents
How to Patch a Bike Tube With a Patch Kit
Here’s 10 Simple Steps For Patching An Inner Tube:
- Remove wheel
- If you don’t have a bike stand, I just flip my bike upside down
- Remove the tire off the wheel rim
- Removal is easier with a good set of tire levers like these: Pedro’s Yellow Tire Levers
- Remove inner tube
- Find the puncture
- If puncture isn’t visible, pump tube up with some air and place tube in some water
- Locate the puncture hole by observing air bubbles coming off the tube
- Make a note at location of puncture hole and dry off tube
- Using some sand paper, sand the area around the puncture
- Sanding is very important! It allows the adhesive to bond with the inner tube
- Lightly wipe off any residuals from sanding the tube with a damp cloth
- Apply the preglued patch OR rubber cement to the area in and around the puncture
- Apply the patch
- You can also apply rubber cement to the patch also, don’t be shy and apply liberally, onto the whole surface of the patch
- Apply some light weights to the patch by using any object
- Let it dry
That’s it. You’re done.
Testing Your New Patch Job:
- Put some air in the inner tube after it has dried
- Place tube in some water and observe the area of the patch underwater
- Watch for air bubbles
- No air bubbles means you have a good patch!
Bike Tube Patching Hacks
I’ll tell you a little secret before we begin: you can go to any Walmart Supercenter (there’s always one around) and buy a patch kit from their sports and outdoors bike section, find the Slime branded patch kit, and it’ll only cost about $2, TWO DOLLARS!

They’re tiny boxes, and super lightweight. You wouldn’t even notice carrying their weight with you on a ride. I love them and use them every chance I get if I’m running inner tubes.
Also, here’s my hack: The slime kit comes with circular and oval patches. Pretty standard. But to get DOUBLE the number of patches, I literally cut them in half. I think there’s 6 or 8 patches per kit, so I’ve effectively increased it to 12 – 16 patches. How much is that worth if I had to buy a new inner tube every time?! This patch kit is $2, versus, 12 times $8. I refuse to pay $96 dollars in bike tubes.
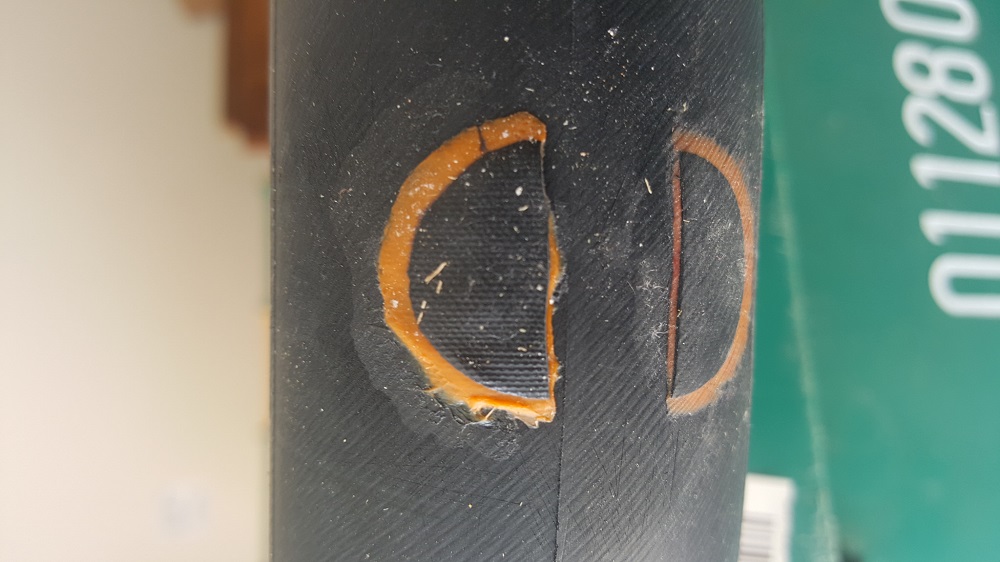
So the picture above explains my hack. As you can see, I had two punctures (snake bite punctures from smashing the inner tube against the rim riding a curb or rock garden). I cut one of the patches in half and used a half for each puncture. MOST PUNCTURES ARE SMALL. I got the idea to do this because it seemed like such a waste to put a big patch on such small puncture holes.
I’ve done this and haven’t had any problems, your mileage may vary though so be careful. I don’t recommend it in some circumstances because it may be difficult to spot where your puncture is when placing the patch over the hole – If you did not center the patch directly over the puncture hole there might a good chance that the next impact could cause the puncture to blow out again. So take precaution if you decide to do this!
So anyway, the patch kit is the way to go. They’re great to take with you on trips because they’re light weight, provided you have a good hand pump like this one: Pro Bike Tool Hand Pump with Gauge – Portable
Or, get a c02 pump that makes it the “super duper ultimate lightweight inner tube flat fixer-upper” hack. I carry this highly rated c02 pump: Pro Bike Tool CO2 Inflator with Insulated Sleeve and Shrader/Presta Valve Compatible
Watch Professionals Patch a Bike Tube:
Watch how the professionals do it. The job is easy enough that any DIY’er should be able to tackle this job. Don’t worry I set it up to play only the important parts, you don’t have to watch the whole thing, you’re welcome!
How to Patch a Bike Tube Without a Patch Kit
Now we’re really talking low budget fixes. Just my style! Even though a patch kit is only about $2 from Walmart, you can essentially have hundreds of patches for about $10 if you’re creative.
- If you haven’t already bought some rubber cement, get some because you’ll need it
- A pair of scissors
- Sand paper
- An old inner bike tube
Here’s how you’ll use this concoction:
Homemade Inner Tube Patch: It Really Works!
I love this one. This is for those who are REALLY in a pinch. In fact, even though I have a job I still make my own patches because it just makes so much sense financially.
Here’s how you can make patch kits for next to nothing in terms of cost that really work.
- Cut up the old inner bike tube (like an old tube with 11 patches!) into smaller sections the size of a quarter or nickel. You can make it square if you prefer to make it easier.
- Buy some sand paper
- Buy some rubber cement
- Follow the steps on how to patch a puncture
- Patch as many punctures as you cut out from the old tube!
It really is that simple, cost effective, and honestly – genius!
When I found out about this strategy, I totally thought it was the best thing since sliced bread.
Just think of it as recycling! I forget where or who I learned this from, it’s nothing new, but it’s totally under rated.
Why Patch Versus Buying a New Tube?
Like I mentioned, to each their own. There is no right or wrong way. It’s most likely better to buy a new tube, but why spend $8 bucks when you can just fix one pretty easily and for significantly less cost? So, it just depends on your situation, but I’ll name a few good reasons why patching a tube wins this argument:
- Cheaper than buying a new tube
- You’re out in the middle of a trail ride, your inner tube crapped out, so you put your spare on, but now your spare also flatted – you have no choice but to patch!
- It’s too late in the day, maybe you’re park riding at midnight and can’t get to a shop to buy a tube
- Your LBS or bike store didn’t have the right size tube, a patch fits onto any size tube
- Lightweight compared to carrying an extra tube (you still carry a pump, or C02, either way)
Pre-glued Patch versus Patch with Rubber Cement
To get an idea of what I’m talking about check these out:
Pre-glued patches:
- Park Tool GP-2 Super Patch Kit
- Slime 20040 SKABS Pre-Glued Patches
Patches with Rubber Cement:
- Park Tool Vulcanizing Patch Kit VP-1
-
Slime 1022-A Rubber Tube Patch
I, personally, prefer the patch kits that use rubber cement like the Park Tool VP-1. I don’t trust the pre-glued patches as I’ve seen a lot of them fail. Check them out and read the reviews for yourself.
Honestly, I would rather make my own patch kits than use the pre-glued patches. It just takes some rubber cement which costs next to nothing and you get a whole lot more for your money. That’s just my style. I hate being ripped off.
Conclusion
I’ve gone on 10 mile trail rides with a tube that had 11 patches with no problems! When I finally got to the 12th puncture, I decided the Frankenstein inner tube was done. I just didn’t want to risk it any more on trail rides. It lives on though, as I’ve cut it up to fix my punctures on my new inner tubes!
I’ve even gone so far as to patch a patch a few times. I don’t exactly recommend that, but I do recommend patching over buying a new tube every single time there’s a puncture – just make sure you do it correctly
Patching works,plain and simple. I can understand some guys who race, or who are competitive just flat out buying a new tube, and I would too, but I don’t ride competitively so to each their own.
Hope I can save ya’ll some money! RIDER UP